Making chocolate is a very exciting process. At Theyo, we are interested and fascinated by every single step. In this text we focus primarily on the concrete production of the chocolate. This means that we explain to you how the manufacturing process works, starting with the roasting. If you are particularly interested in the cocoa harvest, please go this way . Are you not only interested in fermentation for sourdough bread? Here we explain how cocoa beans are fermented so that they can become chocolate.
Why are small manufacturers so interested in a mild roast? Because the fine aromas that develop during fermentation only come through with comparatively low roasting times and temperatures. Because when cocoa beans are fermented really well, they can develop delicious and complex notes. Flavors most people have never tasted in chocolate before. In order to showcase these flavors appropriately, chocolate makers need to be mindful of a few variables. The moisture content, the fat content, the size of the shell and ultimately - if the beans are roasted whole - the thickness of the cocoa bean shells play a role in the roasting. And it is precisely for this reason that manufacturers of fine chocolate develop different roasting profiles for different types of beans. Here, the roasting temperature and the roasting time are usually adjusted, sometimes even the type of roasting process. How do manufacturers find the perfect roast? They carry out many test roasts using the smallest quantities in order to approach the ideal solution.
You can imagine the roasting in the oven as similar to that in your own oven (only larger and more professional ;-) ). The cocoa beans are distributed on perforated trays and roasted horizontally. Since this also has the advantage that the beans remain relatively intact, we also produce our Cool Beans in this way. Apart from that, horizontal roasting also comes with disadvantages: The temperature usually fluctuates in the different areas of the oven, so that a shorter and hotter roasting in the oven is potentially possible.
If you want to try this method at home, you should pay particular attention to smells and noises. Because once the cocoa beans have finished roasting, it sounds like popcorn popping softly. You will soon find tips on how to roast cocoa beans at home and make chocolate out of them on our blog! Attentive readers might ask themselves at this point why the nibs are not roasted directly instead of the whole cocoa beans. In fact, it eliminates some of the problems mentioned above. However, a much bigger problem arises with this approach: the cocoa shells have to be removed before roasting. Not all manufacturers succeed in this and could also pose a challenge for you. Nevertheless, everyone should find their own preferred way of roasting.
You may already know the drum roaster from smaller coffee roasters. Because fine coffee in particular is often roasted in drum roasters. The advantage of drum roasting - for both coffee and cocoa beans - is that the roasting is quite even. The drum rotates around an axis so that both the air and the drum itself are heated evenly. As it rotates, the beans are also agitated, also resulting in even contact with the hot metal. In the next step, the beans usually come to a second, cool drum, where they cool down evenly. Since this roasting is easy to control compared to bed roasting, most chocolate manufacturers prefer this method. Since the roasting is very even, it also has the advantage that long roasting at low temperatures is also possible. By the way, there are now even small drum roasters for domestic use.

Now that the cocoa beans are evenly roasted, the manufacturers want to get rid of the cocoa shells. Because these should – if at all – only be used in the chocolate in small amounts. Why? Because cocoa shells are full of fiber. And these, in turn, impede the cacao butter in the cacao beans, making it the biggest foe for beard-melting chocolate. The goal is therefore to get rid of the cocoa bean shells as completely as possible and to break the cocoa beans themselves into small pieces – i.e. cocoa nibs .
There are many ways to grind the cocoa beans. Ultimately, the first step is to break the cocoa beans into small pieces – cocoa nibs. This is often done with mills or the step is already integrated into the winnower. The result is always the same: a mixture of nibs and flaking shells that have already come loose from the inside of the beans during roasting.
The term “winnowing” comes from wheat production. Because here it is literally about separating the wheat from the chaff. And just like the cocoa beans, here the grains of wheat are “cracked” and thrown into the air, allowing the wind to carry away the chaff, leaving only the wheat behind. Of course, this process - for both wheat and cocoa beans - is now mechanically simulated with a so-called Winnower. And while there are now differentiated methods here too, the simplest for smaller manufacturers is the following: you take advantage of gravity. Here, the cocoa beans and shells are broken open and the mixture falls down. Since the inside of the cocoa beans - i.e. the nibs - are heavier, they also fall faster. The cocoa shells, on the other hand, float longer and can therefore be sucked away by a certain suction. In the end, only the cocoa nibs end up at the bottom, while the shells are already sucked away beforehand.
Another common method is an optical sorter. This machine detects cocoa shells and sorts them out using air currents. And what happens to the cocoa shells? While the cocoa nibs are prepared for further processing, the cocoa shells do not necessarily have to be disposed of either. They're great for tea: we like to use a mix of cocoa shells and nibs, complemented with a dash of oat milk or cream. Cocoa shell tea not your thing? The cocoa shells can also be useful for the garden. Because they are high in nitrogen, they are often used as a "booster" in compost or used as mulch. But beware: if you have dogs, please make sure that they do not accidentally eat the cocoa shells. Even if it's "just" the shells, they still contain theobromine, which dogs can't break down.
While this process step is skipped in some chocolate manufacturers, other manufacturers swear by it. Roller, pin, hammer or plate mills are often used here to produce a coarse cocoa mass. What the machines have in common is that they all have fast-spinning plates or blades that cause the cocoa nibs to rub against each other in a confined space. The friction releases the cocoa butter and starts the liquorization. This step speeds up the chocolate production enormously, but it also requires another machine.
The name says it all: the French word 'Mélangeur' means 'mixer' in German and was developed around 1830 in Switzerland by Philippe Suchard. The mélangeur consists of two large stones rubbing against each other. This friction, in turn, generates heat, which loosens the cocoa butter from the nibs. At the same time, the applied voltage reduces the particles of the solids (i.e. the cocoa powder) to a microscopic size. While the mélangeur is a standard step in the chocolate manufacturing process for larger manufacturers, for small manufacturers it is often the central machine that processes the nibs into the finished chocolate mass.
Even if you want to make chocolate at home, the Mélangeur is often the only machine you should own. But be careful: even if the mélangeur only has advantages at first glance, it also has one major disadvantage: processing takes much longer and it is difficult to control the aroma development, because not only is the particle size refined here, but the chocolate mass also aerated.
The ball mill is a large, powerful, cylindrical mixer that uses a ball bearing. As the name suggests, the ball bearings on this machine hit each other, allowing the semi-liquid chocolate mass to be processed extremely finely. In contrast to the mélangeur, the ball mill is very efficient and can do the same job in about a fifth of the time. However, the ball mill does not come without disadvantages: it happens again and again that the chocolate has a grainy texture after processing the ball mill. Also, the ball mill is for refinement only, so a pre-refining step is required.

Who does not know it? Tempering in your own kitchen is annoying and often unsuccessful. The result is often a chocolate coating with gray streaks instead of a nice shine and great crackle. Why is that? The cocoa butter crystals in the chocolate are not structurally correct. Tempering is therefore about bringing the fat crystals into a common shape. In order for this to happen, the fat crystals have to melt completely. Depending on the cocoa content of the chocolate, this happens at around 49 degrees. Larger manufacturers use machines that can heat and cool the chocolate to a specific temperature that is required for the respective cocoa content. Smaller manufacturers, on the other hand, often use the traditional marble slab for this purpose.
How do you know that your chocolate is really well tempered? It shines beautifully, has a smooth break edge and melts slowly and evenly in the mouth. Enough theory? How about a practical unit in the sense of achocolate tasting ? Either privately or as a tasting with the whole team - because chocolate tastes twice as good together!
The production from the bean to the bar
#1 The roast
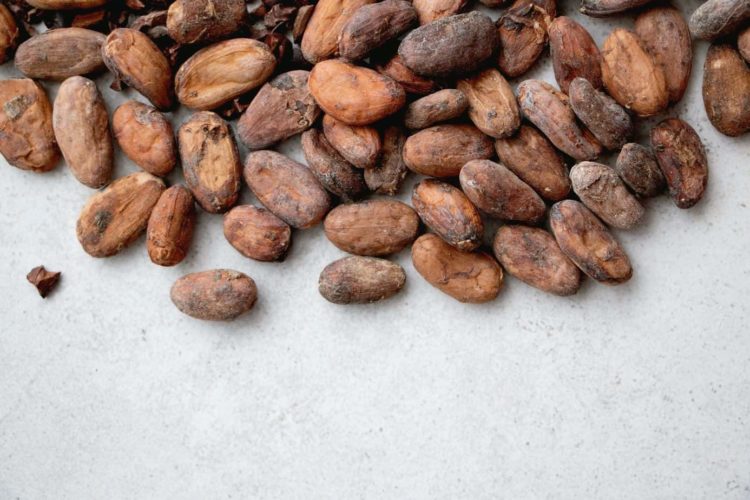
After the cocoa beans have arrived at the chocolate manufacturers, they are - usually - roasted, since the resulting Maillard reaction elicits the beautiful aromas from the beans. This reaction occurs in all cooking processes in which food is changed - from our point of view better - by heat. It's why caramel tastes more complex than regular white sugar. And she is responsible for giving chocolate its nice chocolaty taste. While supermarket chocolate is usually extremely roasted (and dark chocolate is therefore often bitter ), most smaller, fine chocolate manufacturers consciously opt for a mild roast. Some manufacturers, such as our chocolate friends Raaka, even do without roasting completely. And while Raaka produces excellent chocolates, we would advise against ' raw chocolate ' at most other manufacturers.Why are small manufacturers so interested in a mild roast? Because the fine aromas that develop during fermentation only come through with comparatively low roasting times and temperatures. Because when cocoa beans are fermented really well, they can develop delicious and complex notes. Flavors most people have never tasted in chocolate before. In order to showcase these flavors appropriately, chocolate makers need to be mindful of a few variables. The moisture content, the fat content, the size of the shell and ultimately - if the beans are roasted whole - the thickness of the cocoa bean shells play a role in the roasting. And it is precisely for this reason that manufacturers of fine chocolate develop different roasting profiles for different types of beans. Here, the roasting temperature and the roasting time are usually adjusted, sometimes even the type of roasting process. How do manufacturers find the perfect roast? They carry out many test roasts using the smallest quantities in order to approach the ideal solution.
#2 The roast types
One roast fits all? Not when roasting cocoa beans. Instead, the chocolate manufacturers are spoiled for choice here too. You can choose between conventional "lying down roasting" and "drum roasting".
#2.1 The oven roasting
You can imagine the roasting in the oven as similar to that in your own oven (only larger and more professional ;-) ). The cocoa beans are distributed on perforated trays and roasted horizontally. Since this also has the advantage that the beans remain relatively intact, we also produce our Cool Beans in this way. Apart from that, horizontal roasting also comes with disadvantages: The temperature usually fluctuates in the different areas of the oven, so that a shorter and hotter roasting in the oven is potentially possible. If you want to try this method at home, you should pay particular attention to smells and noises. Because once the cocoa beans have finished roasting, it sounds like popcorn popping softly. You will soon find tips on how to roast cocoa beans at home and make chocolate out of them on our blog! Attentive readers might ask themselves at this point why the nibs are not roasted directly instead of the whole cocoa beans. In fact, it eliminates some of the problems mentioned above. However, a much bigger problem arises with this approach: the cocoa shells have to be removed before roasting. Not all manufacturers succeed in this and could also pose a challenge for you. Nevertheless, everyone should find their own preferred way of roasting.
#2.2 The drum roast
You may already know the drum roaster from smaller coffee roasters. Because fine coffee in particular is often roasted in drum roasters. The advantage of drum roasting - for both coffee and cocoa beans - is that the roasting is quite even. The drum rotates around an axis so that both the air and the drum itself are heated evenly. As it rotates, the beans are also agitated, also resulting in even contact with the hot metal. In the next step, the beans usually come to a second, cool drum, where they cool down evenly. Since this roasting is easy to control compared to bed roasting, most chocolate manufacturers prefer this method. Since the roasting is very even, it also has the advantage that long roasting at low temperatures is also possible. By the way, there are now even small drum roasters for domestic use. 
#3 Separating the wheat from the chaff: chop and remove the skin
Now that the cocoa beans are evenly roasted, the manufacturers want to get rid of the cocoa shells. Because these should – if at all – only be used in the chocolate in small amounts. Why? Because cocoa shells are full of fiber. And these, in turn, impede the cacao butter in the cacao beans, making it the biggest foe for beard-melting chocolate. The goal is therefore to get rid of the cocoa bean shells as completely as possible and to break the cocoa beans themselves into small pieces – i.e. cocoa nibs .
#3.1 The crushing
There are many ways to grind the cocoa beans. Ultimately, the first step is to break the cocoa beans into small pieces – cocoa nibs. This is often done with mills or the step is already integrated into the winnower. The result is always the same: a mixture of nibs and flaking shells that have already come loose from the inside of the beans during roasting.
#3.2 The "stripping" aka Winnowing
The term “winnowing” comes from wheat production. Because here it is literally about separating the wheat from the chaff. And just like the cocoa beans, here the grains of wheat are “cracked” and thrown into the air, allowing the wind to carry away the chaff, leaving only the wheat behind. Of course, this process - for both wheat and cocoa beans - is now mechanically simulated with a so-called Winnower. And while there are now differentiated methods here too, the simplest for smaller manufacturers is the following: you take advantage of gravity. Here, the cocoa beans and shells are broken open and the mixture falls down. Since the inside of the cocoa beans - i.e. the nibs - are heavier, they also fall faster. The cocoa shells, on the other hand, float longer and can therefore be sucked away by a certain suction. In the end, only the cocoa nibs end up at the bottom, while the shells are already sucked away beforehand. Another common method is an optical sorter. This machine detects cocoa shells and sorts them out using air currents. And what happens to the cocoa shells? While the cocoa nibs are prepared for further processing, the cocoa shells do not necessarily have to be disposed of either. They're great for tea: we like to use a mix of cocoa shells and nibs, complemented with a dash of oat milk or cream. Cocoa shell tea not your thing? The cocoa shells can also be useful for the garden. Because they are high in nitrogen, they are often used as a "booster" in compost or used as mulch. But beware: if you have dogs, please make sure that they do not accidentally eat the cocoa shells. Even if it's "just" the shells, they still contain theobromine, which dogs can't break down.
#4 Grinding the nibs
The nibs are about half fat (cocoa butter) and half solids (cocoa powder) and are ground in the next step. Here, the cocoa nibs are transformed into cocoa mass. But how exactly does this work? First, the cocoa butter should be extracted during grinding. This contributes to the viscosity of the chocolate, which in turn makes it easier to work with the liquid chocolate in machines. But in addition to the cocoa butter, the nibs also contain solids. And this has to be refined during grinding. This means that the particles in the cocoa powder are reduced into many microscopic particles. There are different methods to achieve this. We will now introduce you to the most common ones.
#4.1 The liquor
While this process step is skipped in some chocolate manufacturers, other manufacturers swear by it. Roller, pin, hammer or plate mills are often used here to produce a coarse cocoa mass. What the machines have in common is that they all have fast-spinning plates or blades that cause the cocoa nibs to rub against each other in a confined space. The friction releases the cocoa butter and starts the liquorization. This step speeds up the chocolate production enormously, but it also requires another machine.
#4.2 The Melangeur
The name says it all: the French word 'Mélangeur' means 'mixer' in German and was developed around 1830 in Switzerland by Philippe Suchard. The mélangeur consists of two large stones rubbing against each other. This friction, in turn, generates heat, which loosens the cocoa butter from the nibs. At the same time, the applied voltage reduces the particles of the solids (i.e. the cocoa powder) to a microscopic size. While the mélangeur is a standard step in the chocolate manufacturing process for larger manufacturers, for small manufacturers it is often the central machine that processes the nibs into the finished chocolate mass. Even if you want to make chocolate at home, the Mélangeur is often the only machine you should own. But be careful: even if the mélangeur only has advantages at first glance, it also has one major disadvantage: processing takes much longer and it is difficult to control the aroma development, because not only is the particle size refined here, but the chocolate mass also aerated.
#4.3 the ball mill
The ball mill is a large, powerful, cylindrical mixer that uses a ball bearing. As the name suggests, the ball bearings on this machine hit each other, allowing the semi-liquid chocolate mass to be processed extremely finely. In contrast to the mélangeur, the ball mill is very efficient and can do the same job in about a fifth of the time. However, the ball mill does not come without disadvantages: it happens again and again that the chocolate has a grainy texture after processing the ball mill. Also, the ball mill is for refinement only, so a pre-refining step is required.#5 The roller
The steel roller is also an integral part of chocolate production. Depending on the chocolate manufacturer, this consists of three to five rollers. The first two rollers roll on top of each other, similar to a small pasta machine that some of you may have used to make pasta at home. Here the chocolate is practically carried out. The second and third rollers roll away from each other, the chocolate is pressed through here again. If the roller has two more rollers, i.e. five in total, then this pressing process is repeated. The same applies here: a pre-refining step is usually necessary so that the chocolate can be fed through the rolling mills. In contrast to the ball mill, the particles in the steel roller are rounded off, which - according to some chocolate manufacturers - makes the haptics particularly pleasant.#6 The conche
While manufacturers like Georgia Ramon (almost completely) do without conching, this step is standard for most manufacturers. Here the cocoa particles are "massaged" while the chocolate mass is aerated at the same time. This step also helps to round off the particles and coat them evenly with the cocoa butter, creating a delicately melting mouthfeel. Conching also helps get rid of unwanted flavors and acidity by adding air (i.e., oxygen) through vigorous stirring or mixing. And while this step is almost always carried out, the duration is highly controversial among manufacturers. While large manufacturers like Lindt conch for up to 80 hours and "lose" many flavors as a result, smaller, finer manufacturers usually conch between 12 and 30 hours.
#7 Last but not least: Tempering
Who does not know it? Tempering in your own kitchen is annoying and often unsuccessful. The result is often a chocolate coating with gray streaks instead of a nice shine and great crackle. Why is that? The cocoa butter crystals in the chocolate are not structurally correct. Tempering is therefore about bringing the fat crystals into a common shape. In order for this to happen, the fat crystals have to melt completely. Depending on the cocoa content of the chocolate, this happens at around 49 degrees. Larger manufacturers use machines that can heat and cool the chocolate to a specific temperature that is required for the respective cocoa content. Smaller manufacturers, on the other hand, often use the traditional marble slab for this purpose. How do you know that your chocolate is really well tempered? It shines beautifully, has a smooth break edge and melts slowly and evenly in the mouth. Enough theory? How about a practical unit in the sense of achocolate tasting ? Either privately or as a tasting with the whole team - because chocolate tastes twice as good together!


